

Google Course - Agentic Engineering from Scratch - Part 1
https://www.youtube.com/watch?v=vE31B0D3n08
Goals
To learn what AI agents are, not just in theory, but in practice.
Look at the ideas behind modern agents.
Build your very first AI agent step by step using Google's ADK.
Understand how AI agents reason, act, and adapt, and you'll have code that you can actually run yourself.
So What are AI Agents?
At the simplest level, an agent is software that doesn't just answer; it can decide and take action. Instead of generating a single response like a traditional chatbot, it looks at your request, figures out what steps need to be taken, maybe calls an API, runs code, looks at the results, and then decides what to do next.
One of the clearest explanations comes from the research paper ReAct: Synergizing Reasoning and Acting in Language Models.
// To read the research paper: https://arxiv.org/pdf/2210.03629
The idea in that paper was simple but powerful. Language models shouldn't just generate text in one go. They can actually reason step by step, take an action like calling a tool or API, observe the results, and then decide what to do next.
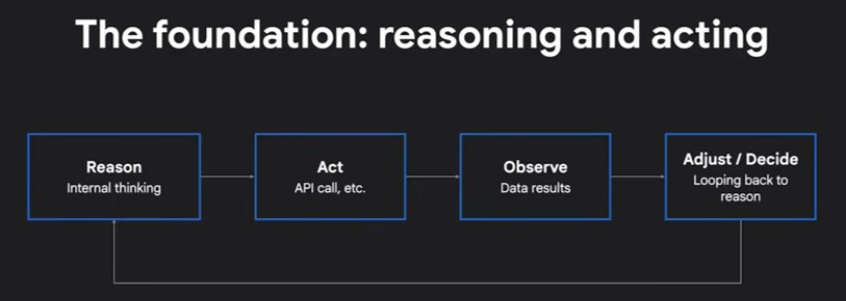
That cycle of reasoning, acting, observing, and adjusting is the foundation of how modern AI agents work, and it lines up with how it's defined: Systems with reasoning, planning, and memory, with enough autonomy to adapt and make decisions on behalf of the user.
Now, not all agents behave in the same way. A useful way to think about them is in three broad patterns:
First, we have Sequential Agents. These run step-by-step like an assembly line. Predictable and rigid. >> Good for simple, predictable flows.
Second, we have Reactive Agents. These decide in the moment; they look at the current state and ask, "What should I do next?" They're flexible, but they don't plan ahead. >> Good for dynamic problems.
Lastly, we have Deliberate or Planning Agents. These pause to sketch a plan, then execute. Think about booking travel. You don't just buy a flight randomly. You pick dates, hotels, and then that's the order of steps that you follow through. >> Good for multi-step goals with dependencies.
Each of them should be applied to different problems.
SDK vs ADK
SDK (Software Development Kit): Comprehensive suite of tools used to build traditional platform applications.
ADK (Agent Development Kit): Specialised framework designed to build autonomous AI agents capable of reasoning, planning, and tool execution.
Building a Blog-Writing Agent with Google ADK
You give it a topic, it will generate a structured outline, turn that outline into a full blog post, and then suggest alternative titles and hooks.
This is where ADK's categories come in.
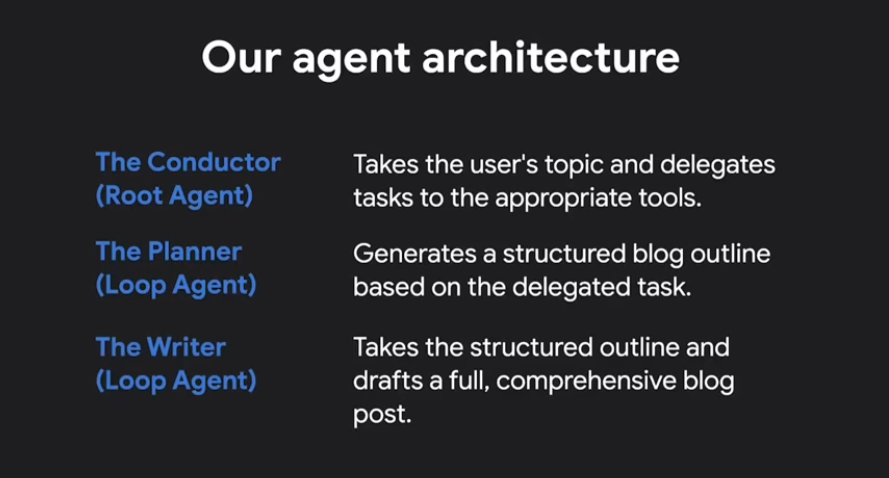
As we walk through the code, notice how the planner and writer agents are LLM agents, which are powered by a model. They're wrapped in loop agents, which are workflow agents in ADK. These handle retries automatically if validation fails. And if we ever wanted something beyond that, ADK would also let us extend a custom agent by subclassing the base agent.
So let's set up the environment and then go line by line through the code.
First off, you need to install UV.
Environment Setup (Terminal)
// Environment Setup
pip install uv
pip install google-adk
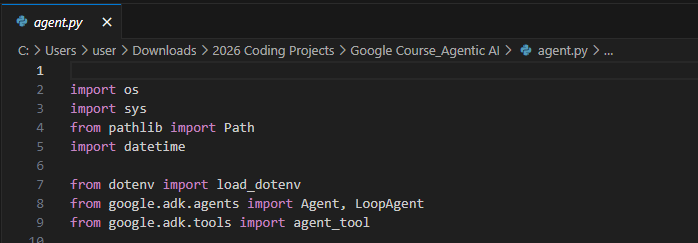
Step 1: Imports and Config
# agent.py
import os
import sys
from pathlib import Path
import datetime

from dotenv import load_dotenv
from google.adk.agents import Agent, LoopAgent
from google.adk.tools import agent_tool

# --- env/config -----------------------
load_dotenv()

MODEL = os.getenv("MODEL", "gemini-flash-latest")
Meet the Planner Agent
We give it the name ("BlogPlanner") so it's easy to identify.
And we tell it which model to use (model=MODEL), which comes from our environment file.
The (description) is just a human-readable note.
The important part of the introduction is in the (instructions). Here we tell it what ot produce.
Finally, we look at the (output_key), we set it to blog outline. This means whatever this agent writes will be stored in shared state under that name so that the next agent to pick it up can do so automatically.
# --- Sub-Agent: Planner ----------------
blog_planner = Agent(
    name="BlogPlanner",
    model=MODEL,
    description="Creates a practical, skimmable outline in Markdown.",
    instruction="""
        You are a technical content strategist. Produce a clear Markdown outline with:
        - Title
        - Short intro
        - 4-6 main sections (each with 2-3 bullets)
        - Conclusion

        If `codebase_context` exists in state, weave in specific sections/snippets.
        Return only the outline in Markdown.
    """,
    output_key="blog_outline"
)
The Outline Validation Checker
Next, we add a second agent. The Outline Validation Checker. This one doesn't write anything new. It just checks the outline. It's instruction is strict. That way we can automatically decide whether to accept the outline or try again.
A critical gate validating the planner's output with 2 simple results: Okay / Retry.
# Outline Validation Checker Class
class OutlineValidationChecker(Agent):
    def __init__(self):
        super().__init__(
            name="OutlineValidationChecker",
            model=MODEL,
            description="Validates that the outline is usable.",
            instruction="""
                Check the outline in state `blog_outline`. If it has a title, intro, 4-6 sections, and a conclusion, respond exactly "ok".
                Otherwise respond exactly "retry" and list missing pieces.
            """,
            output_key="validation result",
        )
Robust Blog Planner
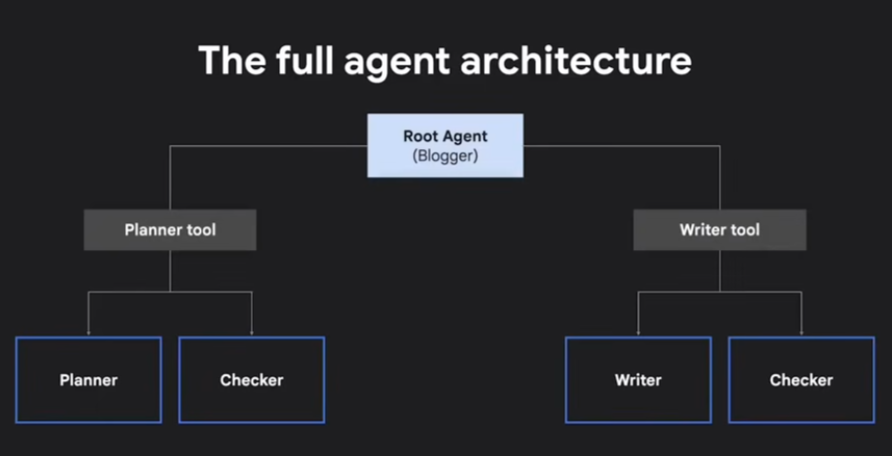
To connect the planner and the checker, we've wrapped them inside a loop agent called Robust Blog Planner.
The loop first runs the planner, then the checker. If the checker says "ok", we're done. If the checker says "retry", the loop runs the planner again with the same instructions. It can do this up to three times. This gives us a safety net. So if the model forgets something, it has another chance to get it right.
The (blog_planner) agent is passed as a sub-agent.
The (OutlineValidationChecker) is another sub-agent responsible for validation.
# The robust_blog_planner
robust_blog_planner = LoopAgent(
    name="RobustBlogPlanner",
    description="Retries planning if validation fails.",
    sub_agents=[
        blog_planner,
        OutlineValidationChecker()],
    max_iterations=3,
)
The Blogwriter Agent
Transforming outlines into full-length technical blog posts.
Now we create another agent called blogwriter, this one takes the outline we just saved in blog outline and turns it into a full markdown blogpost.
The instruction tells it how to write.
The finish draft is saved under (blog_post) in shared state, ready for the next step.
# --- Sub-Agent: Writer ----------------
blog_writer = Agent(
    name="BlogWriter",
    model=MODEL,
    description="Writes a technical blog post from the outline.",
    instruction="""
        Write a complete Markdown article from the outline in `blog_outline`.

        Guidelines:
        - Audience: Software engineers; skip basics and focus on practical insight.
        - Explain both the 'how' and 'why'/
        - Include concise code snippets when helpful.
        - Follow the outline's structure (H2/H3).
        - Output only the final article in Markdown (no fence around the whole post).
    """,
    output_key="blog_post",
)
The Blog Post Validation Checker
class BlogPostValidationChecker(Agent):
    def __init__(self):
        super().__init__(
            name="BlogPostValidationChecker",
            model=MODEL,
            description="Validates the final post.",
            instruction="""
                Check `blog_post` for: intro, clear sections matching the outline, conclusion, and technical clarity.
                If passes, respond "ok". Else respond "retry" with the specific fixes.
            """,
            output_key="validation_result",
        )
Robust Blog Writer
Just like with planning, we combine the writer and its checker into a loop agent, called Robust Blog Writer. This makes the system automatically retry the writing step until the validation passes, up to three times.
# --- The Robust Blog Writer Loop ----------
robust_blog_writer = LoopAgent(
    name="RobustBlogWriter",
    description="Retries writing if validation fails.",
    sub_agents=[
        blog_writer,
        BlogPostValidationChecker()],
    max_iterations=3,
)
Using agent_tool.AgentTool
Now we wrap each loop, the (robust_blog_planner) and the (robust_blog_writer) as tools. This is what lets the root agent call them directly, without worrying about what's happening inside.
# --- Wrap Each Loop as Tools --------------
# Expose planner/writer as tools so the root agent can call them explicitly
planner_tool = agent_tool.AgentTool(agent=robust_blog_planner)
writer_tool  = agent_tool.AgentTool(agent=robust_blog_writer)
Root Agent: Blogger
Finally, we put it all together with the root agent called Blogger.
The instructions Blogger are simple. When a user gives it a topic, first it calles the planner tool to make an outline. Then it calls the writer tool to draft the full post. And finally it adds three alternative titles and two sweet tweet length hooks.
The root agent only has access to the two tools we exposed, the planner, and the writer. So it's workflow is clear and controlled.
# --- Root Agent: Trends → Plan → Write ----
root_agent = Agent(
    name="Blogger",
    model=MODEL,
    description="Minimal multi-agent blogger that plans and writes.",
    instruction=f"""
        If the user gives a topic:
        1) Call the planner tool to generate the outline.
        2) Call the writer tool to produce the full draft.
        3) End with 3 alternate titles and 2 tweet-length hook.

        If the trends tool fails or times out, continue with a sensible outline and draft anyway.

        Date: {datetime.datetime.now().strftime("%Y-%m-%d")}
    """,
    tools=[
        planner_tool,
        writer_tool,
    ],
)
You've successfully written your first agent script. The next step is to run it.
Running with ADK Web
ADK Web (Terminal)
adk web
Head into your terminal and launch it using this command with ADK web. So you can view everything inside a simple UI.

Local ADK Web Link (Browser)
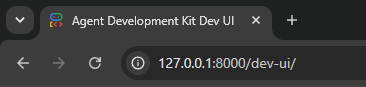
Once that is running, open the local ADK web link in your browser and start interacting with the agent directly.
To kick things off, I'm going to ask it to generate a blog on the top 10 use cases for AI agents. Let's see how it plans, writes, and delivers the results. Your subagents will then work together to create a blog post.
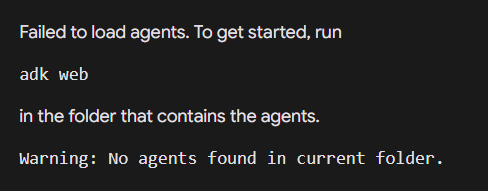
Debugging using "adk web" vs "adk run ."
Why this happens on Windows
When you simply type adk web, the server defaults to scanning parent paths or structural workspaces. Explicitly appending the . forces the local FastAPI server to map the configuration, state graphs, and streaming API responses directly to the agent.py in your active working directory.
Once you run adk run ., let me know:
Did it successfully start an interactive chat session in your terminal?
If it failed, what error traceback or missing environment variable notice did it print?
Gemini API Key
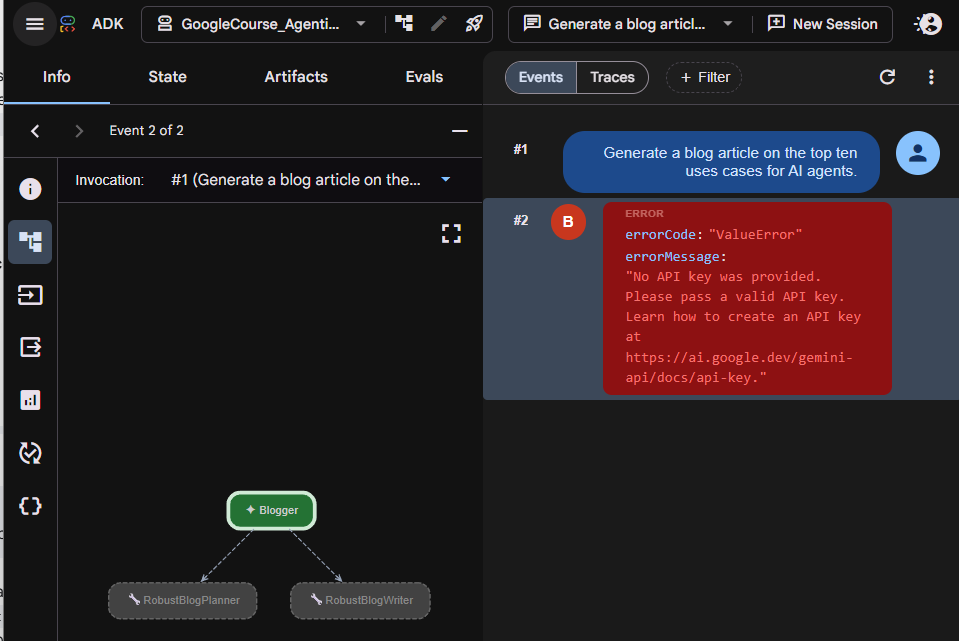
https://ai.google.dev/gemini-api/docs/api-key
Create a new key.
You can pass your valid api key via 2 methods.
(1) Use an .env file (I did this)
ADK automatically reads environment variables from a file named .env in your project folder.
Create a file named .env (make sure it has no .txt extension) directly inside your project directory.
Add your Gemini API key to the file.
GOOGLE_API_KEY="YourActualAPIKeyGoesHere"
(2) Set it directly in PowerShell (I did not do this)
Save the file and restart your agent with (adk run .) or (adk web .)
Gemini Overloaded with Requests

Try again, or switch to a faster, lower-demand model.
Switched from latest model to the latest LITE model.
# --- env/config ---------------------------
load_dotenv()

# MODEL = os.getenv("MODEL", "gemini-flash-latest")
# gemini model currently experiencing high demand, cannot run the latest model...
MODEL = os.getenv("MODEL", "gemini-flash-lite-latest")
Boom it works perfectly now.
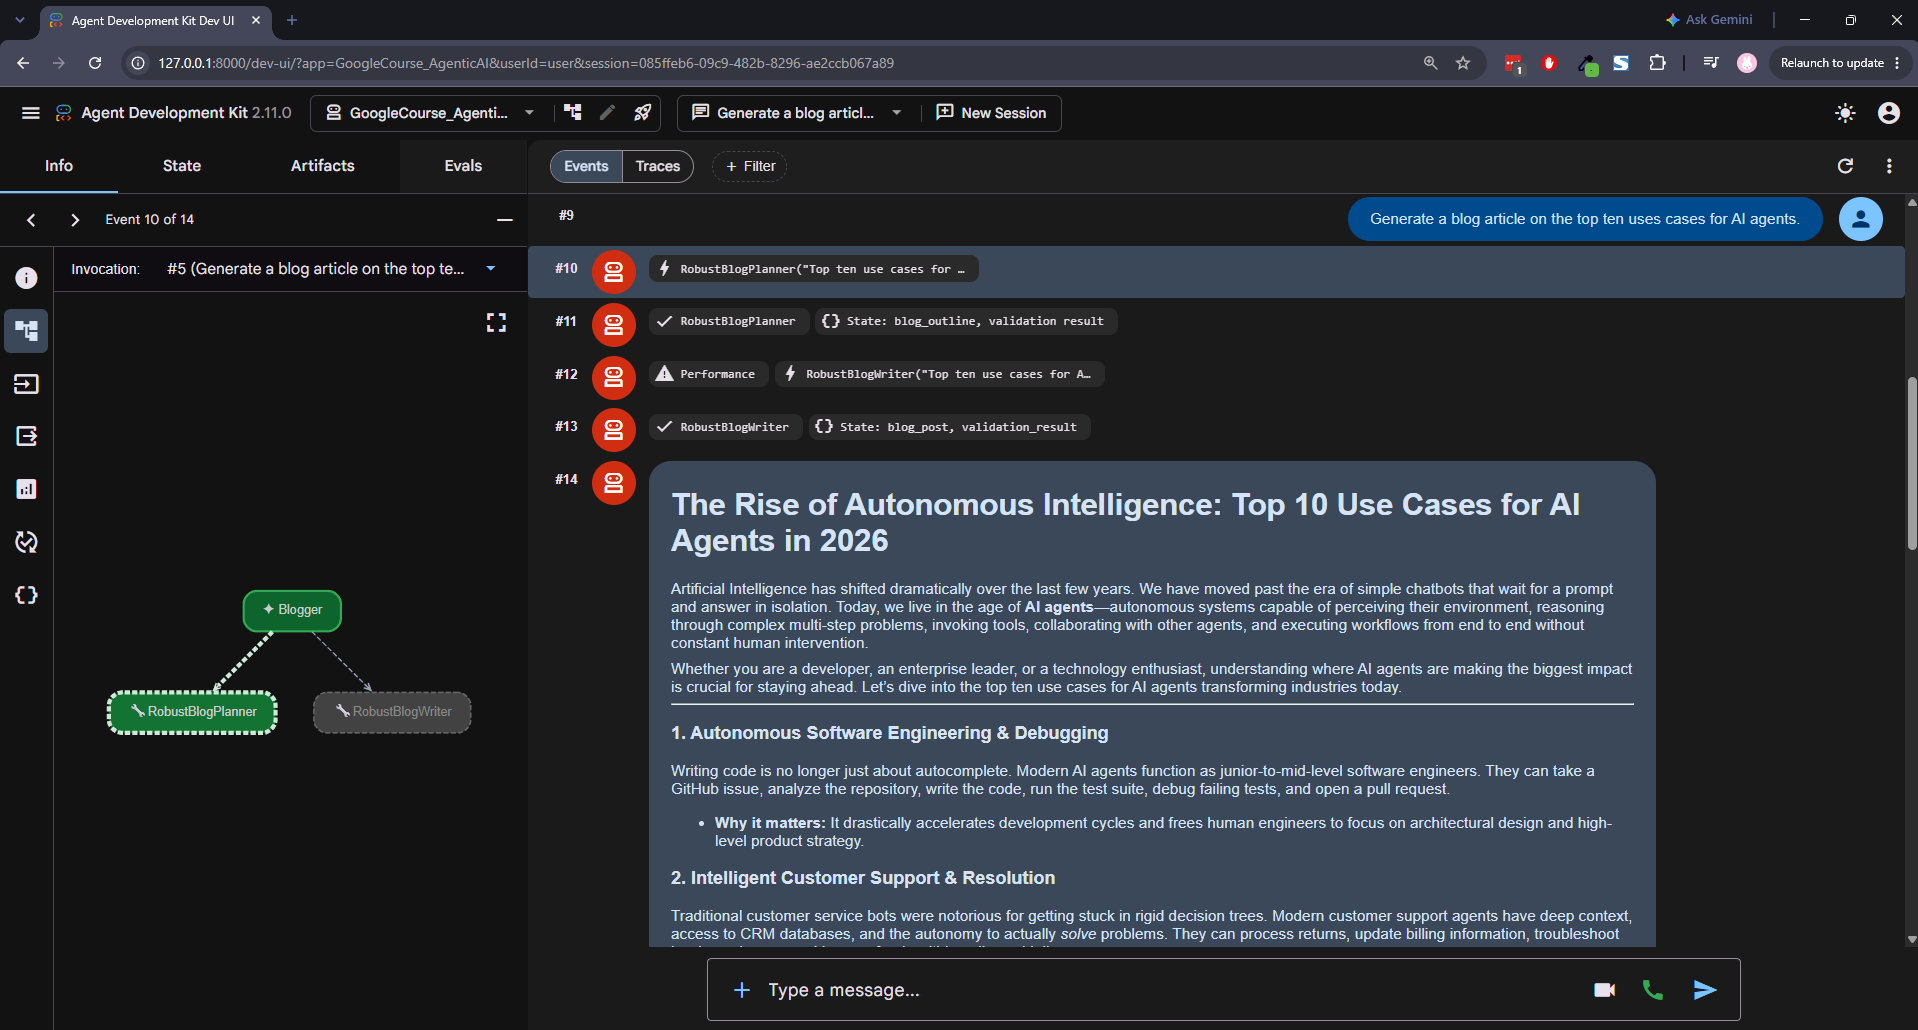
And that's it. You've built and run your first AI agent with Google's ADK. We started from the idea of what agents are, then walked through the code step by step, and finally saw it come to life in the terminal.